Introduction to Kato 381 Series Weathering
The Kato 381 Series weathering technique is a transformative process that adds depth and realism to model railroading. Through weathering, model trains such as the Kato 381 Series, known for their fine craftsmanship and historical accuracy, can be made to look worn and weathered, mimicking the natural effects of time, use, and exposure to the elements. Weathering not only enhances visual appeal but also adds authenticity by replicating real-world conditions, making the models more lifelike and relatable to both hobbyists and viewers. This detailed process goes beyond simple decoration—it’s an artistic method that can bring new life to your train models.
Table of Contents
Understanding the Kato 381 Series and Why Weathering Is Essential
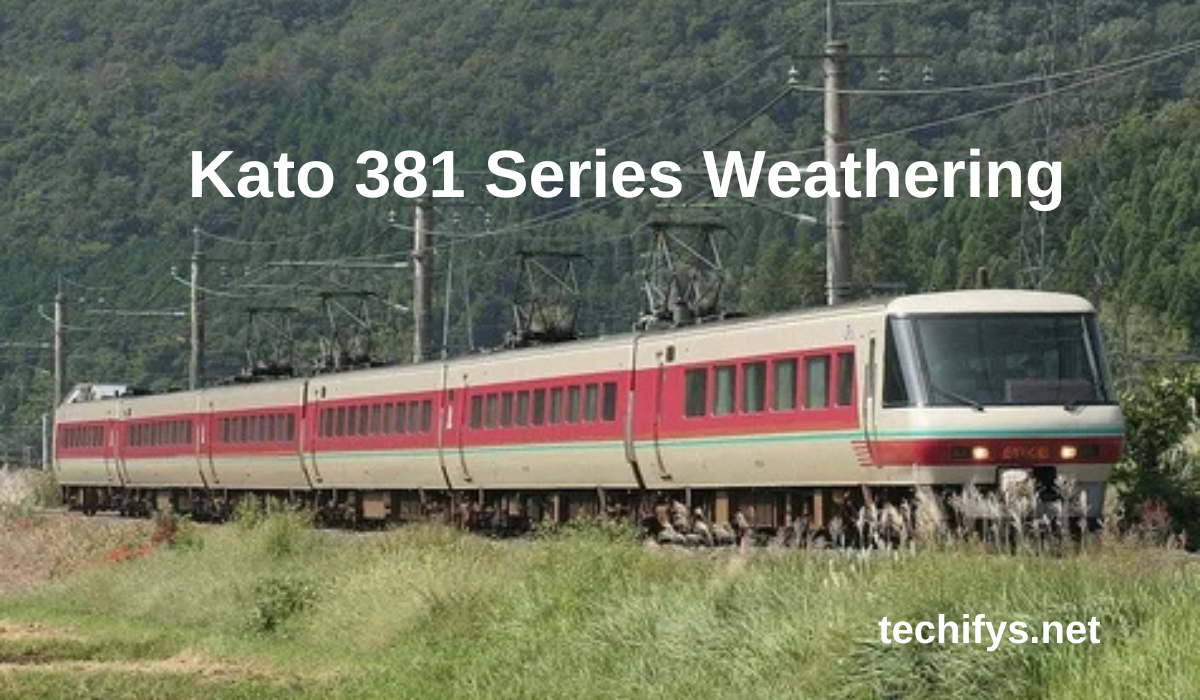
The Kato 381 Series represents a crucial segment of Japan’s railway history. These models, celebrated for their precision, capture the essence of the original trains, down to the finest details. From accurate logos to detailed bodywork, these models offer a realistic portrayal of the 381 Series trains used across Japan. But, even the most detailed models can benefit from weathering. Adding realistic wear—such as grime, rust, and fading paint—can make the model feel like it’s part of a working railway system, exposed to all the challenges of daily use.
Weathering elevates your Kato 381 Series model from a pristine display piece to something that truly captures the essence of the environment it’s intended to represent, whether it’s a bustling city center, a rural landscape, or the harsh coastal winds.
Key Features of the Kato 381 Series Models
The Kato 381 Series models are highly regarded for their attention to detail, superior build quality, and realistic operation. Here are the standout features that make the Kato 381 Series a popular choice among model railroaders:
1. Exceptional Detailing
One of the hallmarks of the Kato 381 Series is its precision in replicating the fine details of real-world trains. These models feature meticulously crafted components, such as:
- Accurate Body Shapes: The body design closely mirrors the original trains, ensuring proportionality and authenticity.
- Intricate Components: The models include carefully detailed elements like window frames, doors, and undercarriages that reflect the real-life vehicles they represent.
- Paint Schemes and Logos: Kato has faithfully replicated the unique paint schemes and logos used on the 381 Series trains, ensuring that even the smallest visual details are correct.
2. Smooth, Reliable Performance
Kato is known for its commitment to operational reliability, and the 381 Series is no exception. These models are equipped with:
- N-Scale Track System (N-TRACS): This technology ensures smooth operation on tracks, providing stable and quiet running even at high speeds.
- Precision Engineering: The mechanical components, including wheels, motors, and gears, are designed for smooth and consistent movement, making the trains ideal for both display and operational layouts.
- Stable Power Supply: Kato trains are known for their ability to maintain power even on complex track layouts, ensuring that the trains stay in motion without interruptions.
3. Durability and Build Quality
The build quality of Kato’s 381 Series models ensures that they are built to last. The use of durable materials and careful assembly contributes to:
- Longevity: These models are made to withstand frequent handling without compromising their appearance or functionality.
- High-Quality Components: From the fine details on the exterior to the inner mechanical parts, every component is designed for both aesthetics and durability.
4. Authentic Scale and Proportions
The Kato 381 Series models are made in precise N-scale, which is a popular scale among model railroaders. N-scale allows for intricate detailing while remaining compact enough to fit in smaller layouts. Despite their size, Kato ensures that all components are proportionally accurate, giving the models a realistic presence.
5. Interchangeable Parts and Customization
For modelers who enjoy customizing their layouts or trains, the Kato 381 Series offers opportunities for modification:
- Interchangeable Parts: Kato provides parts that can be swapped out or upgraded, allowing hobbyists to modify the trains to their preference.
- Customization Potential: The level of detail in the models provides a good base for weathering, painting, and adding unique features, making them perfect for hobbyists looking to create a personalized look.
6. Ease of Maintenance
Kato models are designed with maintenance in mind. The parts are easy to access and maintain, and the trains are engineered to be serviced with minimal effort. This is especially beneficial for modelers who like to ensure their trains remain in peak condition for years to come.
7. Compatibility with Other Models
Because of the high-quality engineering of the Kato 381 Series, these models integrate seamlessly with other Kato products as well as N-scale layouts from different manufacturers. This compatibility ensures that the 381 Series can fit easily into a larger setup, whether it’s a dedicated diorama or an expansive operating layout.
8. Realistic Sound and Lighting Options
Many Kato 381 Series models come with optional lighting systems and sound features that enhance the realism of the train. These can include:
- Interior and Exterior Lighting: Realistic headlights, tail lights, and interior cabin lighting for a more authentic experience.
- Sound Features: Optional sound systems that simulate engine noise, horn sounds, and other train operations.
Tools and Materials for Weathering the Kato 381 Series
To get started with weathering, it’s important to gather the right tools and materials. Here’s a breakdown of what you’ll need:
Essential Tools:
- Airbrush: For applying smooth, even coats of paint and washes, an airbrush is ideal for achieving realistic finishes.
- Paintbrushes: Use fine-tipped brushes for detailed work around edges, wheel assemblies, and other intricate areas.
- Sponges and Stippling Brushes: Great for creating texture and simulating dirt or weather effects.
- Hobby Knives and Tweezers: Essential for handling small parts and for any necessary adjustments.
Key Materials:
- Acrylic Paints: These are versatile for both base layers and washes.
- Weathering Powders: Special powders designed to simulate rust, dirt, and grime.
- Washes: Thinned-down paint is used to settle into crevices and replicate the effects of aging.
- Protective Coatings: After applying weathering, sealing the model with a matte or semi-gloss varnish will preserve the work.
Step-by-Step Guide to Weathering the Kato 381 Series
Weathering your Kato 381 Series model train is an art form that can transform it from a pristine replica to a lifelike representation of a working train, with all the wear and tear that comes with exposure to the elements and daily use. Below is a detailed, step-by-step guide to help you weather your Kato 381 Series model, from initial preparation to final touches.
Step 1: Preparation
Cleaning the Model
Before applying any weathering effects, it’s essential to clean the model thoroughly to remove any oils, dust, or debris left from the manufacturing process. This ensures that weathering materials will adhere properly. Use:
- Mild Soap and Water: Gently clean the model with a soft brush and water. Avoid soaking the model to prevent damage to sensitive components.
- Isopropyl Alcohol: For stubborn areas, you can use a small amount of isopropyl alcohol on a cotton swab to remove any excess oils or dirt.
- Dry Thoroughly: Let the model dry completely before proceeding to the next step.
Priming (Optional but Recommended)
Although Kato models generally come with a smooth surface, priming can help weathering materials adhere better and create an even surface. If you choose to prime:
- Use a light, even coat of gray or tan primer. This can be applied using a spray can or airbrush.
- Allow the primer to cure completely before moving forward.
Step 2: Apply Base Layers
General Dirt and Grime
Start by applying a base layer of grime to give the model an aged look:
- Acrylic Paint: Mix a diluted wash of dark brown or black acrylic paint with water or acrylic thinner. Using a sponge or flat brush, gently dab or apply this wash over the model’s body, focusing on lower areas and spots where dirt naturally accumulates.
- Stippling: For a more textured effect, use a sponge to dab on patches of brown or gray paint. This simulates dirt build-up and weathering from frequent use.
Rust Effects on Metal Components
Rust naturally forms on metal components exposed to moisture and the elements. You can simulate this on areas such as the wheel assemblies and undercarriage:
- Rust-colored Wash: Use a rust-colored wash and apply it to metal areas like wheels, axles, and exhaust pipes. Lightly blend the rust wash so it appears as though it is naturally oxidizing over time.
Step 3: Adding Realistic Streaks and Detailing
Rust Streaks
After applying base rust, focus on adding streaks to simulate the gradual corrosion of metal parts:
- Fine Brush Work: Use a very fine brush to apply thin rust streaks from the top of the model, downwards. Focus on joints, seams, and areas where water runoff would naturally carry rust down the body.
- Apply Diluted Paint: To create realistic streaks, dilute your rust-colored paint further, allowing it to flow naturally down the model’s surface.
Oil and Grime
Trains often accumulate oil leaks, grime, and dirt from various mechanical components. These can be simulated with:
- Dark Brown or Black Paint: Use a very small amount of thinned dark brown or black paint and lightly apply it around wheel assemblies, mechanical components, and near the undercarriage where oil leaks would occur.
- Smudging: With a soft brush or cloth, gently smudge the paint into streaks, making the oil stains look more natural and diffused.
Faded Paint Effects
Trains in real life experience fading due to sun exposure, weather conditions, and wear:
- Sanding and Weathering the Paint: For subtle fading effects, lightly sand the painted surfaces in areas where wear would naturally occur, like on the roof or on parts of the body exposed to the sun.
- Acrylic Wash: Apply a very thin wash of a lighter color (such as tan or light gray) over the sanded areas to mimic the faded look of sun-bleached paint.
Step 4: Weathering the Wheels and Underbody
The wheels and underbody of a train accumulate significant grime, rust, and dirt due to constant contact with the tracks. Here’s how to weather these parts:
- Wheel Detailing: Use a metallic paint (like steel or iron) for the wheels and apply a light wash of rust to the sides. This gives the wheels a realistic weathered look.
- Bogies and Undercarriage: The undercarriage, often exposed to the most wear, should be given extra attention. Use a mix of rust and dirt washes to add depth to the bogies and axle parts. Focus on the areas where dirt and rust would naturally accumulate, such as the joints and wheel hubs.
Step 5: Final Details and Touch-ups
Adding Fine Details
At this stage, you can refine your weathering job by adding finer details:
- Dirt on Windows: Lightly weather the window frames and glass with a very diluted wash of gray or brown to create the effect of dust, water stains, or grime.
- Dirt on Roofs: The roofs of trains accumulate soot, dust, and other materials, so apply a light wash of black or gray on the roof areas. Use a sponge for texture or an airbrush for a smooth, even application.
Sealing the Model
Once you’re satisfied with the weathering, it’s crucial to seal the work to prevent it from rubbing off during handling or while running the train:
- Matte Varnish or Semi-Gloss Coat: Use a clear matte or semi-gloss varnish to protect your weathering. This also gives the model a slightly duller, more realistic finish. Apply the coat evenly with a spray can or airbrush, making sure it covers the entire model without clogging the finer details.
- Drying Time: Allow the sealant to cure for at least 24 hours before handling the model to ensure it is fully protected.
Step 6: Displaying and Maintaining the Weathered Kato 381 Series
Once your Kato 381 Series is weathered and sealed, it’s time to display it proudly:
- Dioramas or Layouts: Place your weathered train on a diorama or in a layout that complements its new look. A rustic, industrial, or rural setting can enhance the realism of your model.
- Ongoing Maintenance: Over time, inspect your model and touch up areas that may need re-weathering or additional grime. Use a soft brush to clean the model, removing dust without damaging the weathered finish.
Customizing Weathering for Maximum Realism
When weathering your Kato 381 Series weathering, the more specific you can be with your approach, the better. Consider these tips:
- Environmental Factors: If you’re replicating a coastal or industrial environment, consider adding salt corrosion effects. For rural or mountainous settings, simulate rust and dirt accumulation.
- Research: Study real photos of the 381 Series trains to observe natural wear and weathering. Note patterns of grime, rust, and fading.
Common Weathering Mistakes to Avoid
Even experienced modelers can fall into common traps when weathering. Here are some mistakes to avoid:
- Over-Weathering: Too much weathering can make your model appear unrealistic. Aim for subtle effects and gradual aging.
- Inconsistent Application: Weathering should be consistent with the model’s use and environment. Avoid applying effects where they wouldn’t naturally occur.
- Forgetting Sealing: After spending hours perfecting the weathering, don’t forget to seal your model with varnish to protect your work.
Displaying Your Weathered Kato 381 Series
Once you’ve completed the weathering process, you’ll want to showcase your masterpiece:
- Dioramas and Layouts: Display your model in a diorama or layout to give context to the weathering effects. Use scenery, weathered buildings, and track elements that complement the look of the weathered train.
- Lighting: Proper lighting can help highlight the fine details of your weathering work. Use strategic placement to draw attention to the weathered areas and bring out the depth of your effects.
Conclusion
Mastering the Kato 381 Series weathering technique is a rewarding process that can greatly enhance the realism of your model trains. By using the right tools, materials, and techniques, you can bring a new level of depth and authenticity to your models, turning them into lifelike representations of real-world railroads. Whether you’re working on a display model or an operational layout, weathering adds an undeniable level of detail that enriches the entire model railroading experience.
Experiment with different techniques, learn from the process, and don’t hesitate to share your work with the community. With patience and creativity, you can transform your Kato 381 Series models into true works of art that are as captivating as they are realistic.
FAQs
1. What is weathering in model railroading?
Weathering in model railroading refers to the process of applying techniques to replicate natural wear and tear on a model train. This includes adding rust, grime, fading paint, and dirt effects to give the model a more realistic, aged appearance.
2. How can I weather my Kato 381 Series model train?
To weather a Kato 381 Series model, you can use techniques such as dry brushing, washes, airbrushing, and adding weathering powders. Start by cleaning the model, applying base layers of grime, adding rust streaks, and finally sealing the model to protect the finish.
3. What tools are required for weathering a Kato 381 Series?
For weathering, you’ll need tools like brushes (fine-tipped and wide), an airbrush, weathering powders, washes, acrylic paints, sponges, and a varnish or matte spray for sealing. Some people also use precision tools like hobby knives for fine detailing.
4. How can I prevent over-weathering on my Kato 381 Series?
To avoid over-weathering, apply weathering materials in layers and build up the effects gradually. Focus on high-wear areas and ensure the effects are subtle and realistic. Always test on a small area first to avoid excess buildup.
5. How do I maintain and preserve the weathering on my Kato 381 Series?
To maintain the weathering, keep the model in a dust-free environment and use a soft brush or compressed air to clean it regularly. For touch-ups, you can reapply weathering materials as needed, and always protect the finish with a clear matte or semi-gloss varnish to seal the weathering.
YOU MAY LIKE: VPC Venice FL News Newsletter: A Comprehensive Guide to Community Updates